
 |
1.Assemble all the materials that you'll need:
|
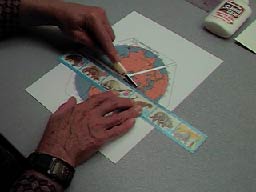 |
2. Score parallel triangular edges of prints across the middle of each diamond-shaped part of the illustrations using a dull, rounded tool; this will aid in later orientation and flexible folds. |
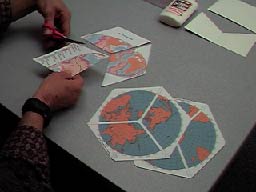 |
3. Cut out diamond-shaped illustrations. |
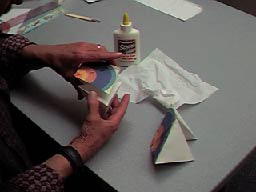 |
4. Glue each diamond-shaped illustration to two tetrahedra, being careful to match points and scoring lines; the tetrahedra should be separated by the gap between the scoring lines. |
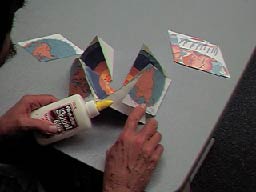 |
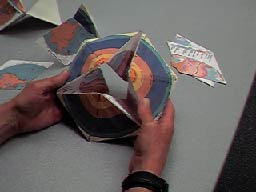
5. After completing one illustration and allowing the glue to dry, fold that illustration into troughs and connect the outside faces of adjacent tetrahedra so that all six tetrahedra are connected (three in the inside troughs, three on the outside "ridges"). |
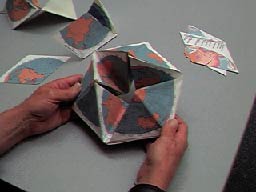 |
6. After the second illustration dries, fold it in to make a trough and glue the third illustration to the outside. The hinge of the first illustration should match the hinge of the third illustration. |
 |
7. Repeat the process with the fourth illustration and let the glue dry. You now have a kaleidocycle with four different illustrations. Clear tape may cover each of the illustrations to make the kaleidocycle sturdier. |
For more information on Kaleidocycles and other projects, visit Jill Britton's page

last modified: 25 April, 2022